
How to build an easy survival base in Minecraft
by HappyTailz on Sat Feb 15 2020.
This base might look a little daunting, but don’t worry, we are going to build this step by step. The real secret to building this base is to focus on one corner and just repeat that for all the other corners.
Preparation for Building the Survival Base
Before we get started, make sure to download the wool template. You can find the world download below.
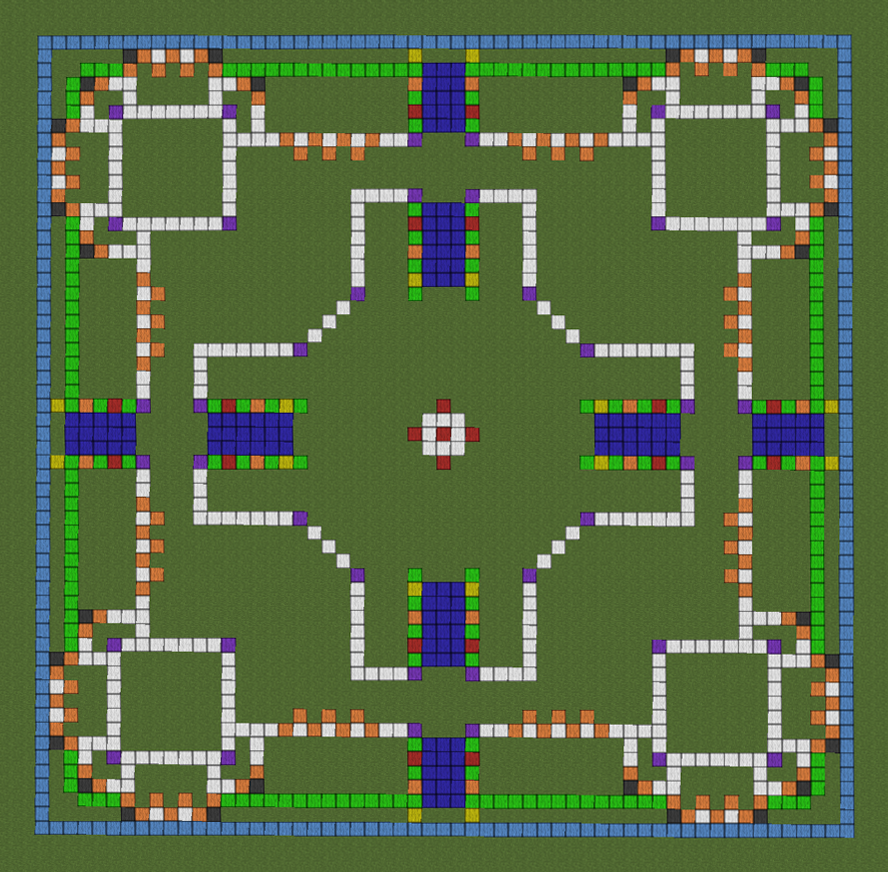
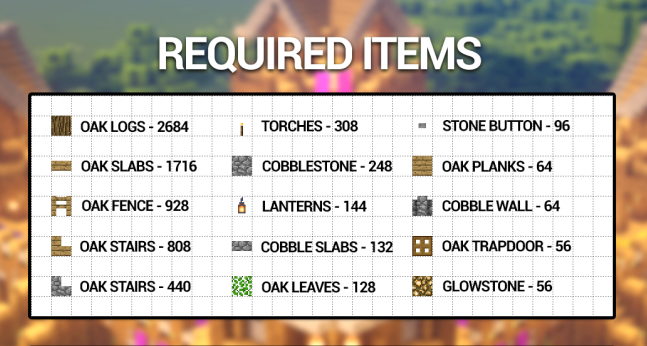
We will be using this template to show you where to place pillars and to give you the general shape of the base. The following items will be needed to complete this build. If you are playing in survival, it’s recommended to grab these first.
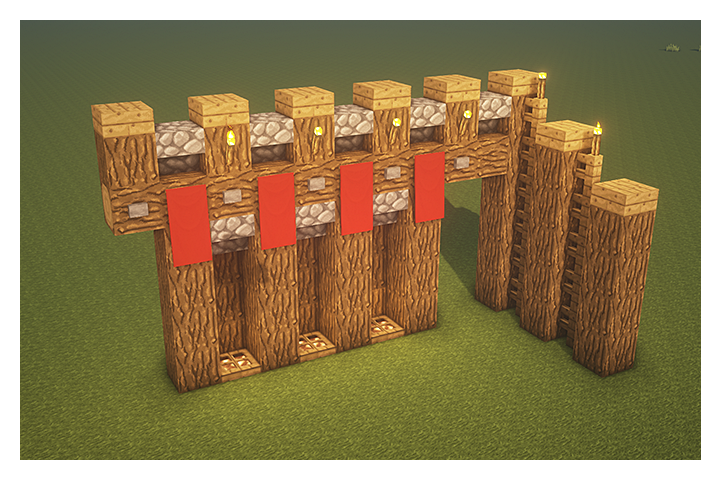
Step 1 – Building Pillars
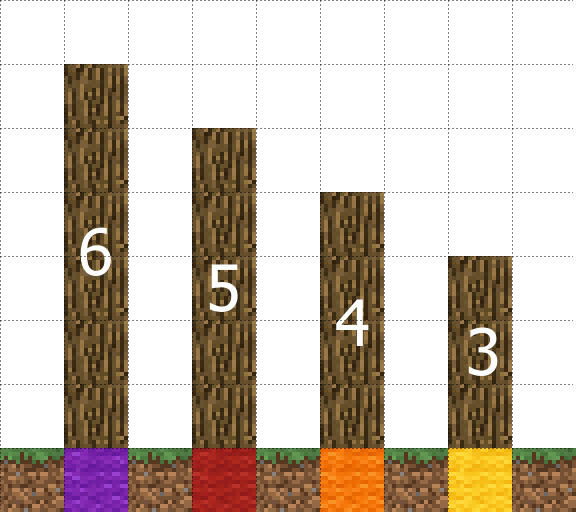
Pick a corner of the base to start in and create pillars as shown in the video above. The wool is color-coded to help you figure out how many blocks are required in each pillar.
- Purple wool = 6 blocks high (oak logs)
- Red wool = 5 blocks high (oak logs)
- Orange wool = 4 blocks high (oak logs)
- Yellow wool = 3 blocks high (oak logs)
Once you have created all the pillars in one corner of the base use the template to help guide you and build horizontal beams.
When you are finished with step 1 your base should start to look something like this: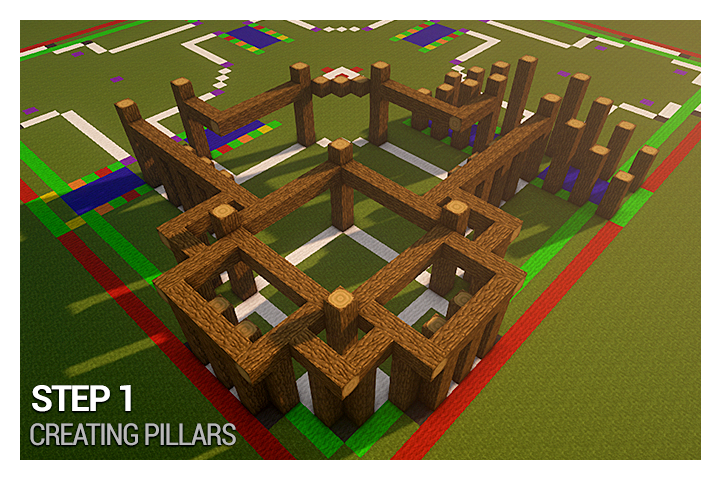
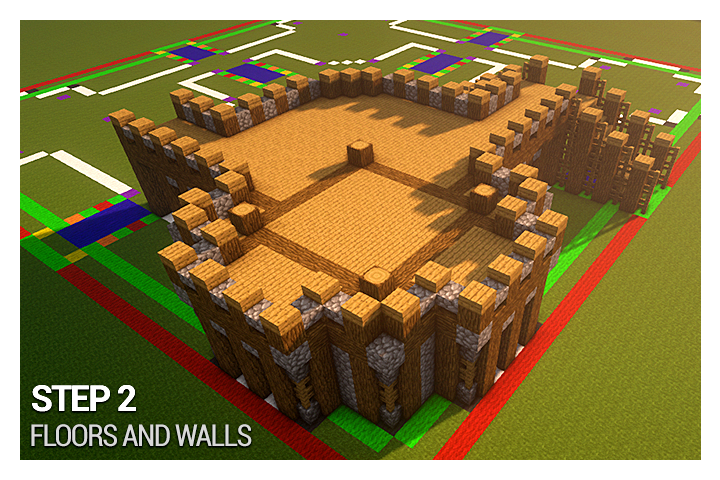
Step 2 – Floors and Walls
Now that we have some pillars in place its time to lay down some flooring. This will also act as the foundation for the second-floor builds.
Luckily as with Step 1, this step is very simple. Build the staircase and flooring with oak stairs and slabs. Watch the video above to see exactly how to do this.
When you are done your survival base should look something like this:
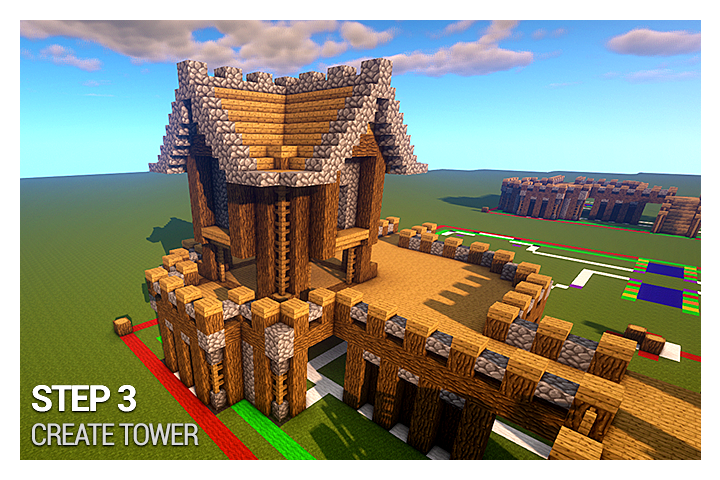
Step 3 – Building the Tower
To help you along with this step, here are some design images for the walls of the tower.
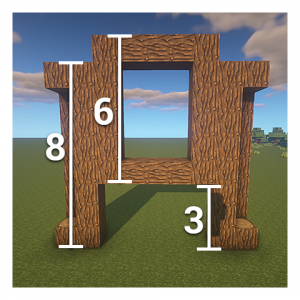
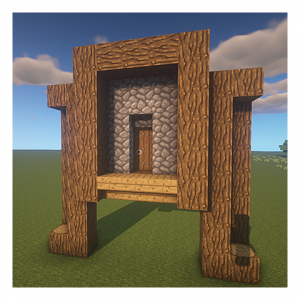
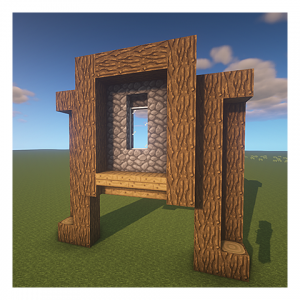
Please note that the cobblestone walls are inset by 1 block.
Use the video to help with this step. Once you have created your first tower remember to build one for each section of the base. Your final tower should look something like this:
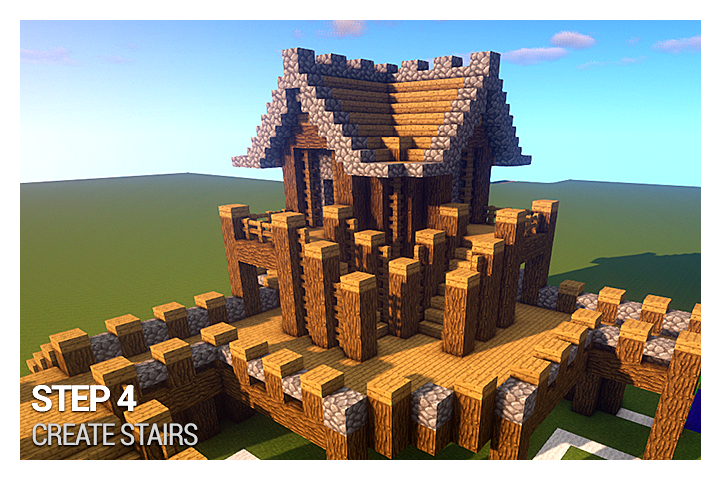
Step 4 – Making Tower Stairs
A tower is not much use without a way to get inside, so let us add one.
The staircase is actually very simple. You just need to add a few pillars, a little bit of flooring and some stairs. When you are done your staircase should look like this:
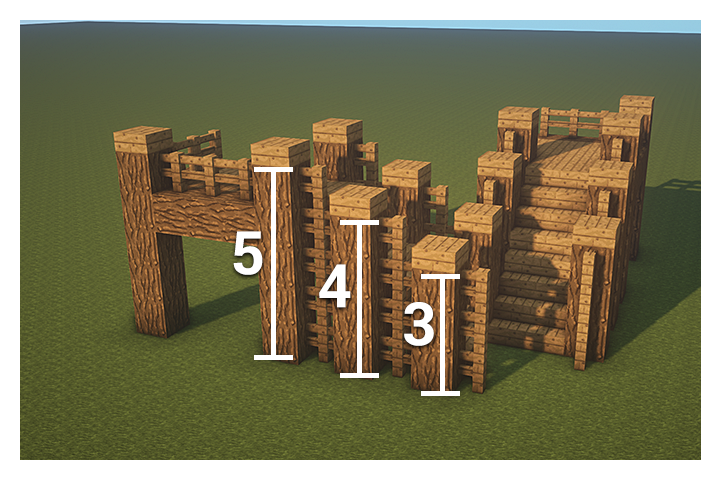
And if you need a slightly easier image to help you out:
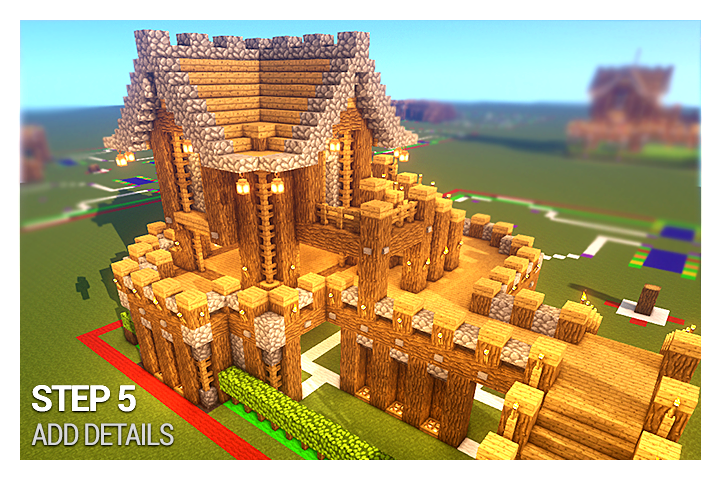
Step 5 – Adding details
Your survival base should be looking almost ready now. Every section should have walls, flooring, and a nice tower. It is time to personalize your base. You will, of course, need some torches or some kind of lighting to ward off those evil mobs. Go wild, add those finishing touches as you see fit. Personally, I added buttons to look like big bolt or nails that are holding the pillars and beams together. Lots of torches and some lanterns to give things a warm feeling.
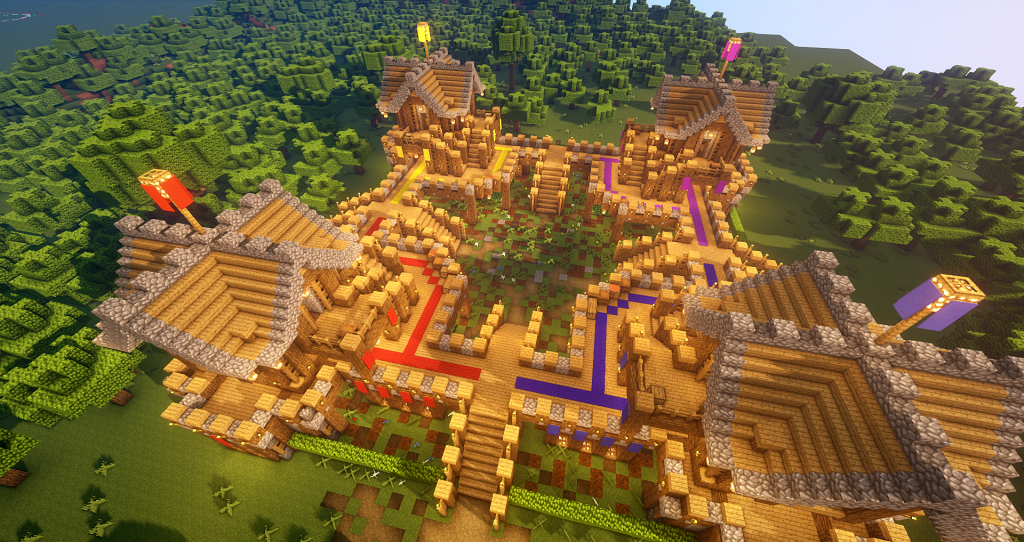
This is what your base should end up looking like:
To really personalize things I decided my base should have color-coding so my teammates could each have their own corner. To do that I added banners and carpets. Like this:
Easy Survival Base Tutorials
This tutorial teaches you how to make an awesome base in Minecraft. Building in Minecraft is one of the most enjoyable activities you can take part in. Go out, find your materials and get building. If you do build our massive survival base then please share it with us using the social links below, we’d love to see your build.
Thanks for reading our tutorial, we hope it helped you out.